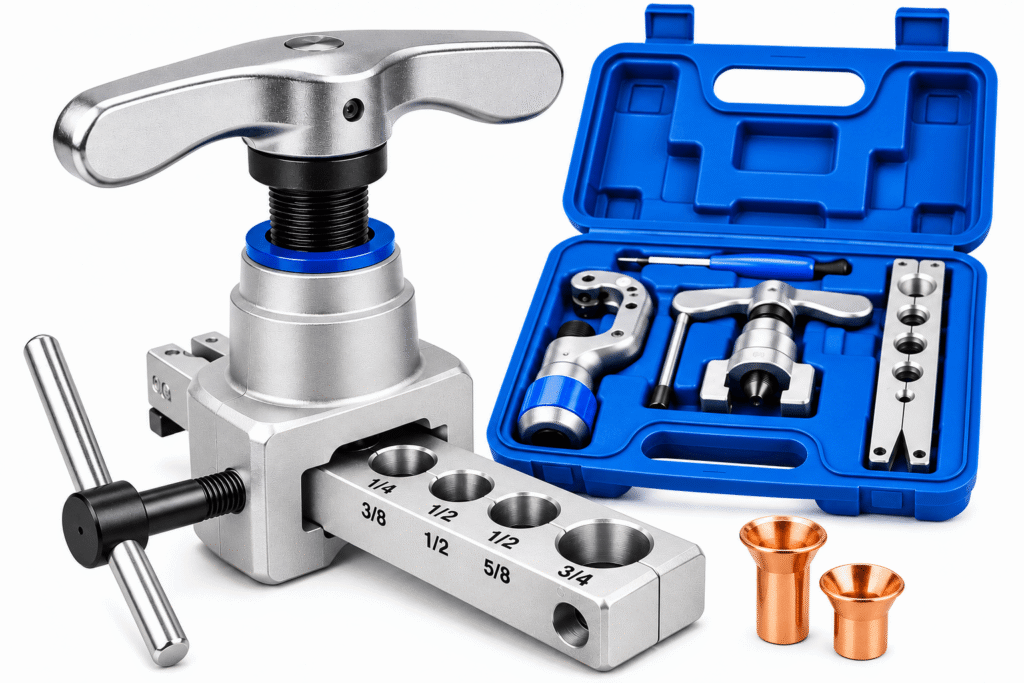
A copper tube flaring tool kit is an essential tool for many HVAC and refrigeration technicians. It creates a shaped opening at the end of soft copper tubing, allowing the tube to connect to a compatible flare fitting.
For technicians working with air conditioning and refrigeration systems, a clean and accurate flare is important. A poorly formed flare can lead to leaks, damaged fittings, or repeated repair work.
In this guide, we explain how an eccentric flaring tool works, how to use it correctly, the difference between flaring and swaging, and what to check before buying a kit.
What Is a Copper Tube Flaring Tool?
A copper tube flaring tool is designed to form a conical edge at the end of a copper tube. This shaped end sits against the matching seat inside a flare fitting. A flare nut holds the connection together and compresses the flared tube against the fitting seat.
Many HVAC and refrigeration applications use a 45-degree flare connection. However, the correct flare angle and fitting standard must always match the equipment manufacturer’s requirements.
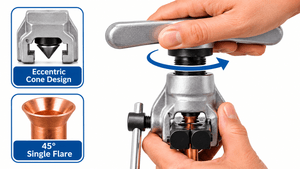
An eccentric flaring tool uses an off-centre cone that moves against the end of the tube to form the flare. Some models also include a clutch or torque-release mechanism to help reduce the risk of over-flaring.
How Does an Eccentric Flaring Tool Work?
The tool normally consists of a clamping bar with several openings for different tube outside diameters, a yoke assembly, and a cone connected to a driving screw.
The copper tube is secured in the correct opening. The cone is then brought into contact with the tube end and operated using the tool handle.
As the cone moves, it gradually forms the tube into a flare. The eccentric movement helps produce a smooth and even flare when the tool is correctly set up and used according to its instructions.
Not every kit has the same design, size range, or accessories. Always check the manufacturer’s specifications before choosing a model.
How to Use a Copper Tube Flaring Tool
A good flare starts with proper tube preparation. Follow the instructions supplied with your particular tool because tube projection, clamping and operating procedures can vary between models.
1. Cut the Copper Tube Square
Use a suitable tubing cutter to make a clean, square cut. An uneven cut can affect the shape and quality of the finished flare.
2. Remove Internal and External Burrs
After cutting, remove burrs and sharp edges from the tube end. Keep copper debris out of the tubing.
3. Select the Correct Clamping Size
Choose the opening that matches the tube’s outside diameter. Place the tube in the clamping bar and secure it firmly.
The tube must be positioned at the correct height according to the tool manufacturer’s instructions. Do not assume that every flaring tool uses the same tube projection.
4. Position the Flare Nut
Before forming the flare, remember to slide the correct flare nut onto the tube, with its threaded end facing the correct direction. This is an easy step to forget, and it may mean cutting the flare off and starting again.
5. Align and Operate the Flaring Cone
Position the yoke and cone correctly over the tube. Turn the driving screw smoothly and steadily until the flare is formed.
If the tool has an automatic clutch or torque-release mechanism, follow the manufacturer’s instructions for its operation. Do not force the handle beyond the tool’s intended stopping point.
6. Remove and Inspect the Finished Flare
Retract the cone, release the clamp and remove the tube carefully.
Inspect the flare before installation. It should be even, smooth and free from visible cracks, splits or serious deformation. If the flare is damaged or uneven, cut it off and repeat the process with a properly prepared tube end.
Flaring vs. Swaging: What Is the Difference?
Flaring and swaging are two different ways of preparing copper tubing.
Flaring forms a conical opening at the end of the tube. The flared surface presses against a matching fitting seat to create a mechanical seal.
Swaging expands the end of a tube so another tube of the same outside diameter can fit inside it. This is commonly used to prepare a connection for brazing.
Although some tool kits include both functions, a flaring tool and a swaging tool do not perform the same job. Always choose the correct tool for the connection you are making.
What to Look for When Buying a Copper Tube Flaring Tool Kit
Choosing the right copper tube flaring tool kit can make a big difference when preparing copper tubing for reliable HVAC and refrigeration connections.
Before buying a kit, consider the following points:
- Tube size range: Check that the clamping bar supports the outside diameters you work with.
- Flare angle: Make sure the tool produces the angle required by your fittings and equipment.
- Eccentric cone design: This mechanism can help produce a smooth, consistent flare when correctly operated.
- Clamping strength: The tube should remain securely held during the operation.
- Torque control: Some models include an automatic clutch or torque-release feature to help prevent excessive pressure.
- Build quality: Look for durable components, accurate machining and a secure clamping mechanism.
- Included accessories: Check whether the kit includes a tubing cutter, deburring tool, adapters or a carrying case. Contents vary between manufacturers and models.
A kit with more accessories is not automatically the better choice. The important thing is whether it matches the tubing sizes and connection standards used in your work.
Common Mistakes to Avoid
Even a good flaring tool can produce a poor result if it is used incorrectly.
- Using a clamping opening that does not match the tube outside diameter.
- Leaving burrs inside the tube after cutting.
- Failing to position the flare nut before forming the flare.
- Allowing the tube to slip inside the clamping bar.
- Applying excessive force to the driving screw.
- Ignoring cracks, uneven edges or other defects in the finished flare.
- Using a 45-degree flare tool with a fitting that requires a different flare standard.
Always inspect the finished flare and follow the equipment manufacturer’s connection and tightening instructions.
Tools That Can Help With Plumbing and HVAC Work
A flaring tool is only one part of a technician’s toolbox. Other hand tools can also be useful during installation and maintenance.
For general pipe fitting and plumbing tasks, see our guide to Best Pipe Wrenches for Professional and Construction Work.
For gripping and tightening different nuts and fittings, our article Best Adjustable Wrenches for Plumbing, Maintenance and Construction Work explains what to consider when choosing an adjustable wrench.
Use the correct wrench for the fitting. A pipe wrench is not a substitute for a properly sized wrench on a copper flare nut.
Final Thoughts
A copper tube flaring tool kit is a practical choice for technicians who regularly work with copper tubing in air conditioning and refrigeration systems.
The quality of the finished connection depends on more than the tool itself. Correct tube preparation, the right clamping size, careful operation and a proper inspection all matter.
Before choosing a kit, compare its supported tube sizes, flare angle, construction quality and included accessories. Most importantly, make sure it is suitable for the fittings and equipment you intend to work on.
Technical references: